


Sometime ago I created a video and blog entry where I installed Nord VPN onto the Avtex AMR 985. Sadly, Avtex no longer make this router anymore and moving on the method I demonstrated just did not work with the new routers. However, I have found a way to install the Nord VPN configuration onto the AMR 994X, AMR995X, AMR104X and AMR105X. This method however is a bit fiddly to set up, but after extensive testing, I’m happy to report that it does work fine.
Again, why should I have a VPN?
Try to access the BBC iPlayer if you are in Spain, France or anywhere outside of the UK, and you will be stopped due to a rights issue. With a VPN you can set your location and access content designated for that country. Other providers such as Netflix, Disney+ and Paramount, region lock their shows for specific countries too. Shows that are available in the US and not available in the UK, can be enjoyed if we set via our VPN a location inside the USA.
As a great example, we were in France last year and Angela wanted to know what’s happening in Eastenders, well we easily achieved this via a VPN set to the UK on our Avtex router. Adding the VPN to the router makes sure that all connected devices are protected and more importantly, devices that cannot support a VPN connection like our Smart TVs or streaming sticks can take advantage of switching locations and unlocking unavailable content.
In the following example, I want to set up a VPN connection from the US. And in this article, I will go through step by step what needs to be done.
Step 1
Preparation
Lets log into our Nord VPN account. If you don’t have one, don’t worry. You can achieve the same thing with other providers, you are looking for the key phrase “OpenVPN Configuration” The following steps assume you are using Nord VPN, so there may be some differences in the steps.
So, lets download the OpenVPN configuration file.
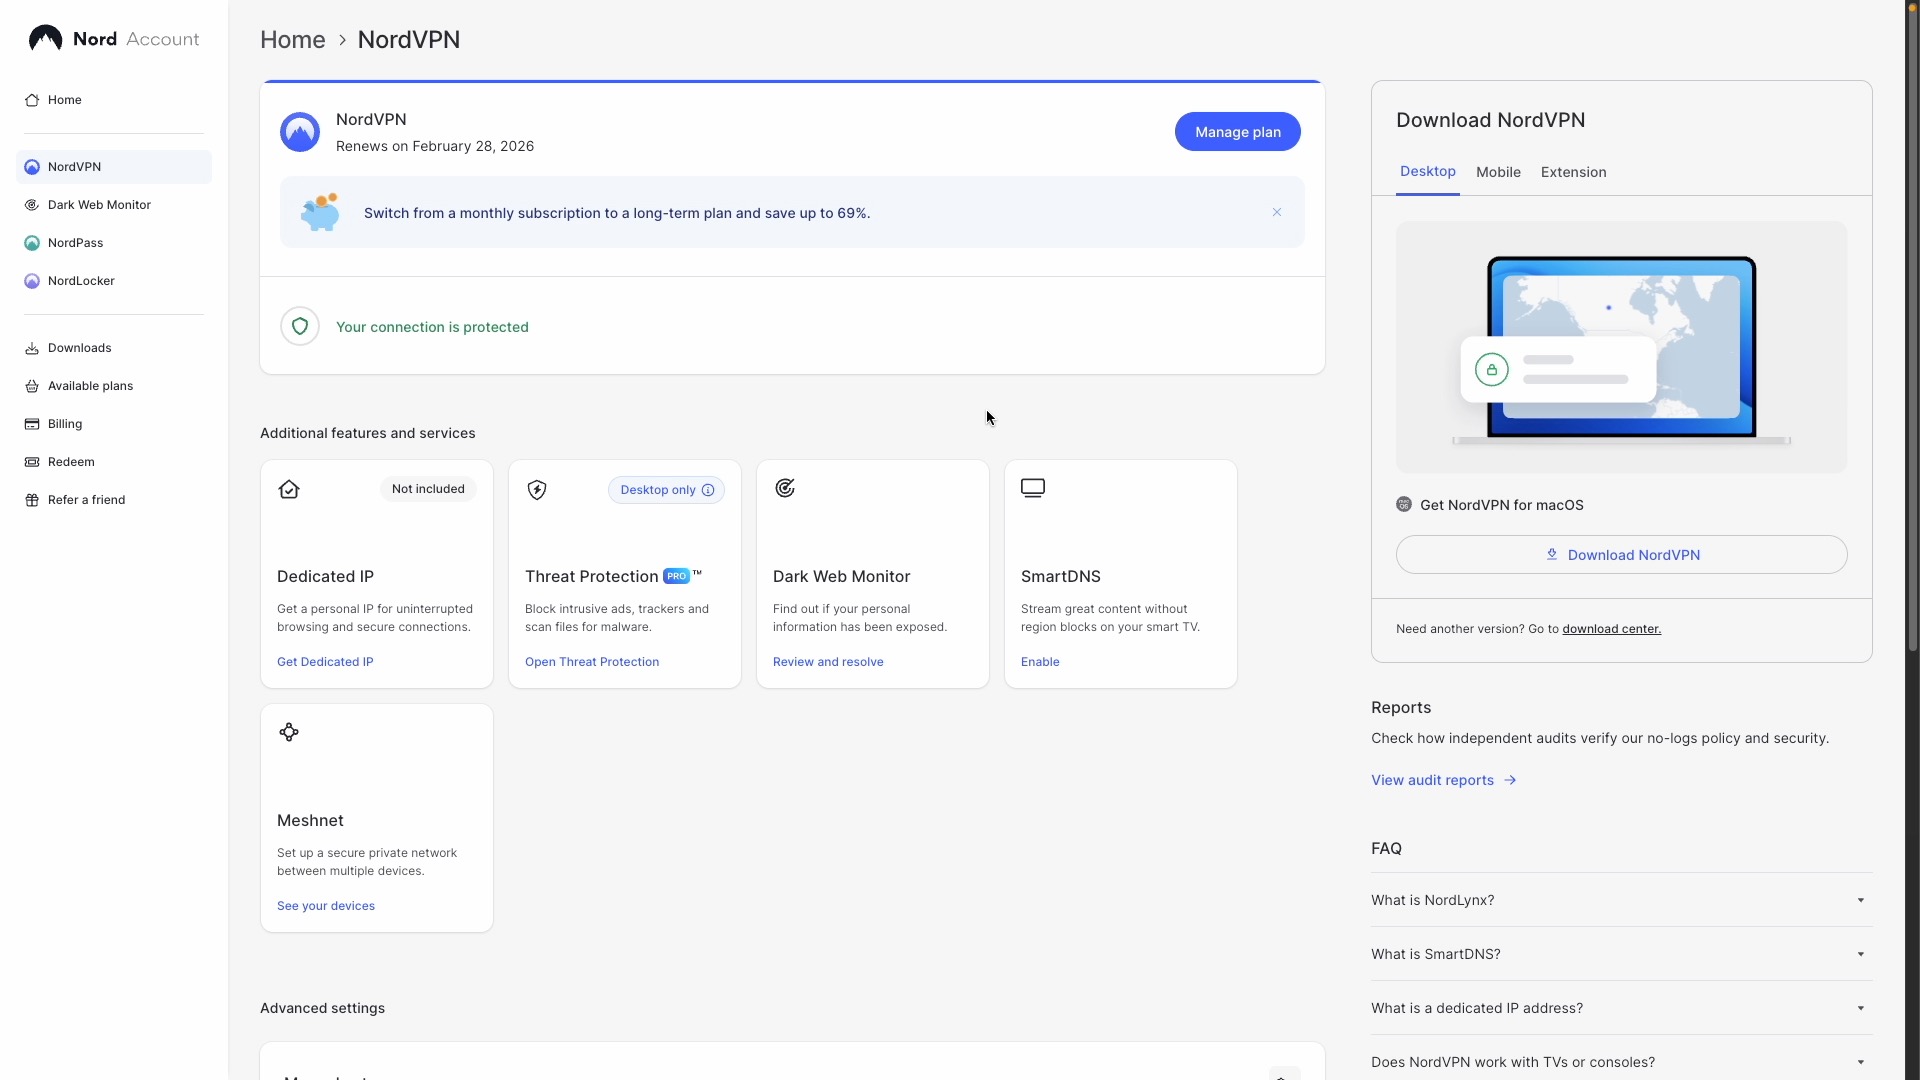
- Log into your NordVPN account
- On the left, Click NordVPN
- Scroll down to “Manual setup”
- Click “Set up NordVPN manually”
- Once loaded, under server recommendation, Click the country you want to use
- In our example, we will select the United States.
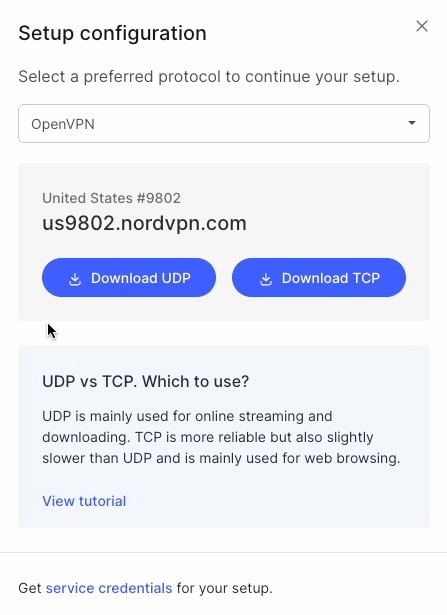
- Below, you will see a list of recommended servers, Click “Get setup configuration”
- We want to download the UDP file, so click “Download UDP” and save that file to your desktop. In our case, the file is named 9802nordvpn.com.udp.ovpn
While we are on the Nord VPN site, lets also create our Service Credentials. We will need these to allow our Avtex Router to use our NordVPN account.
On the Manual Setup page of the NordVPN site, Click Service credentials.
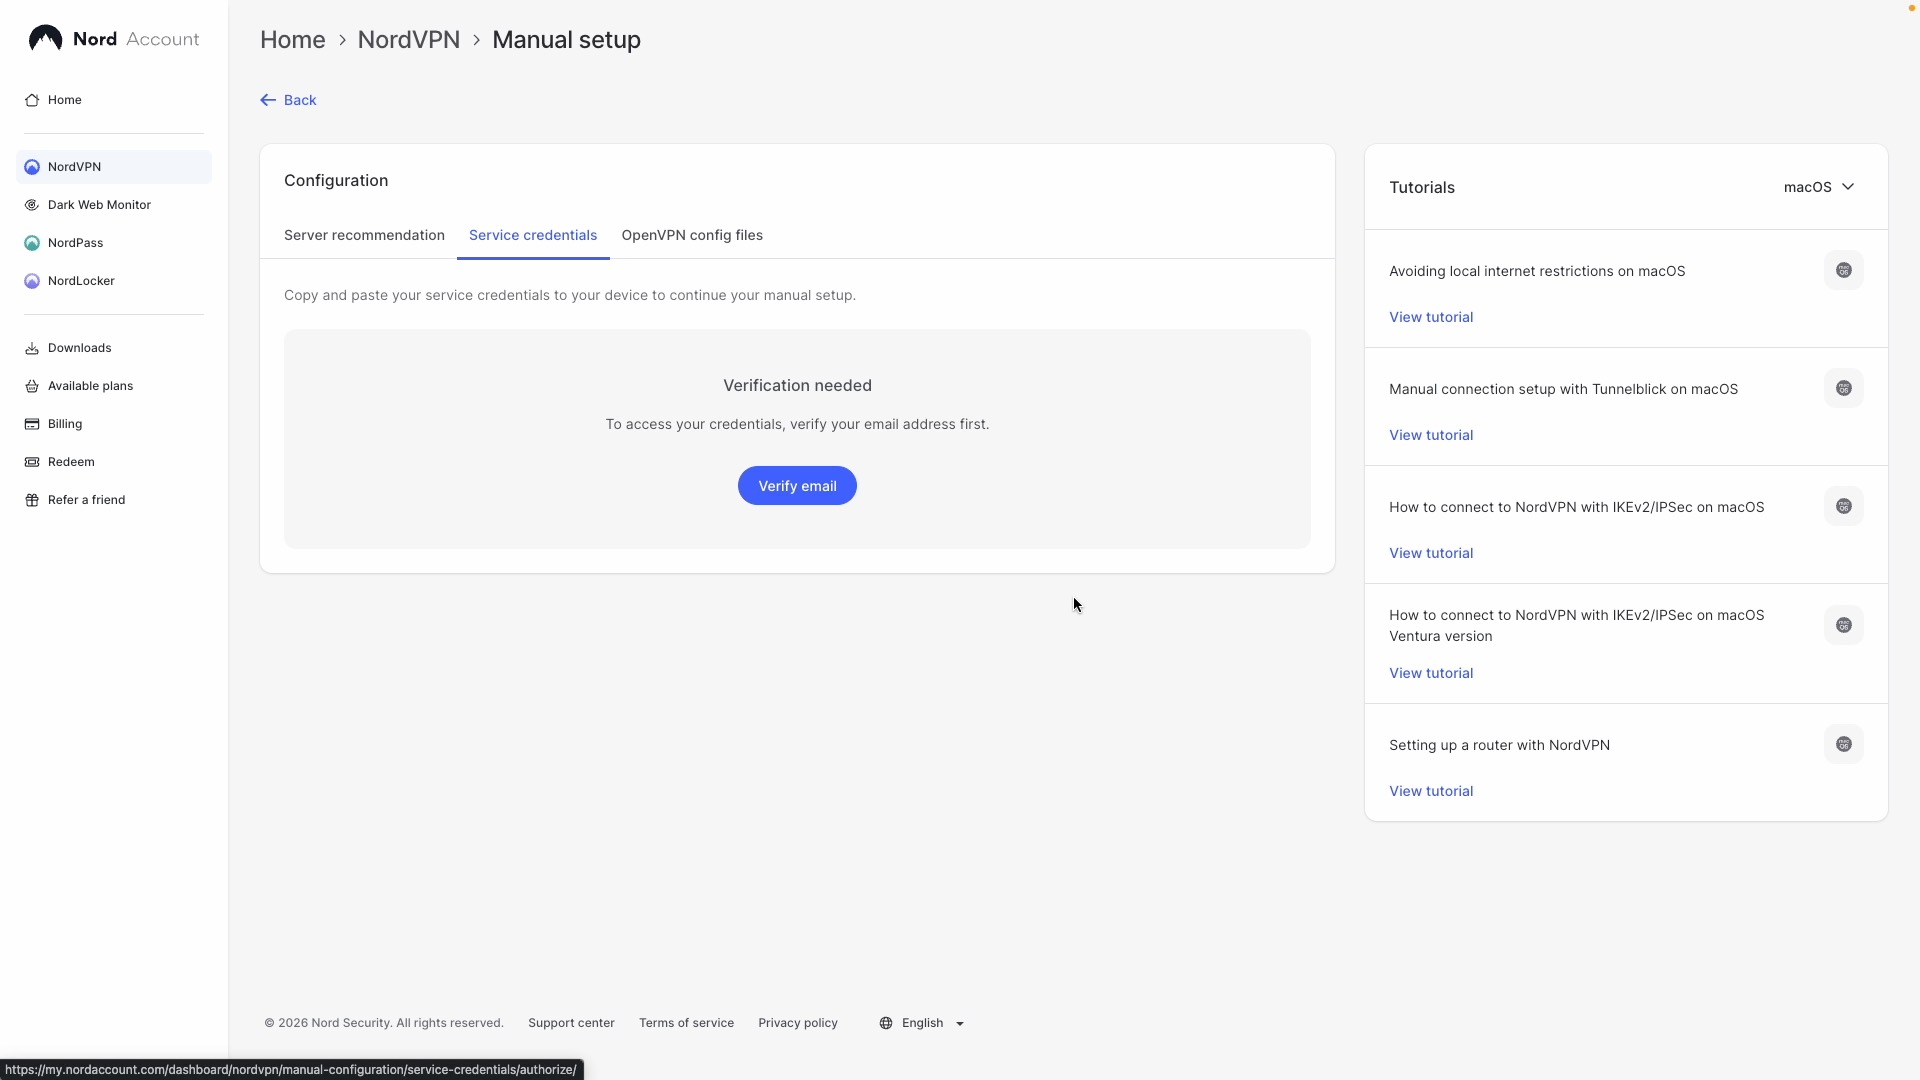
Click verify email, to confirm you are the account holder.
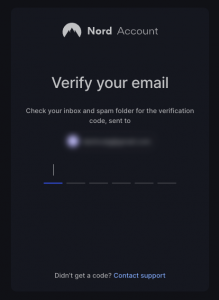
You will now be sent a verification code to your email address, registered with NordVPN. When you get it, type the code in to continue.
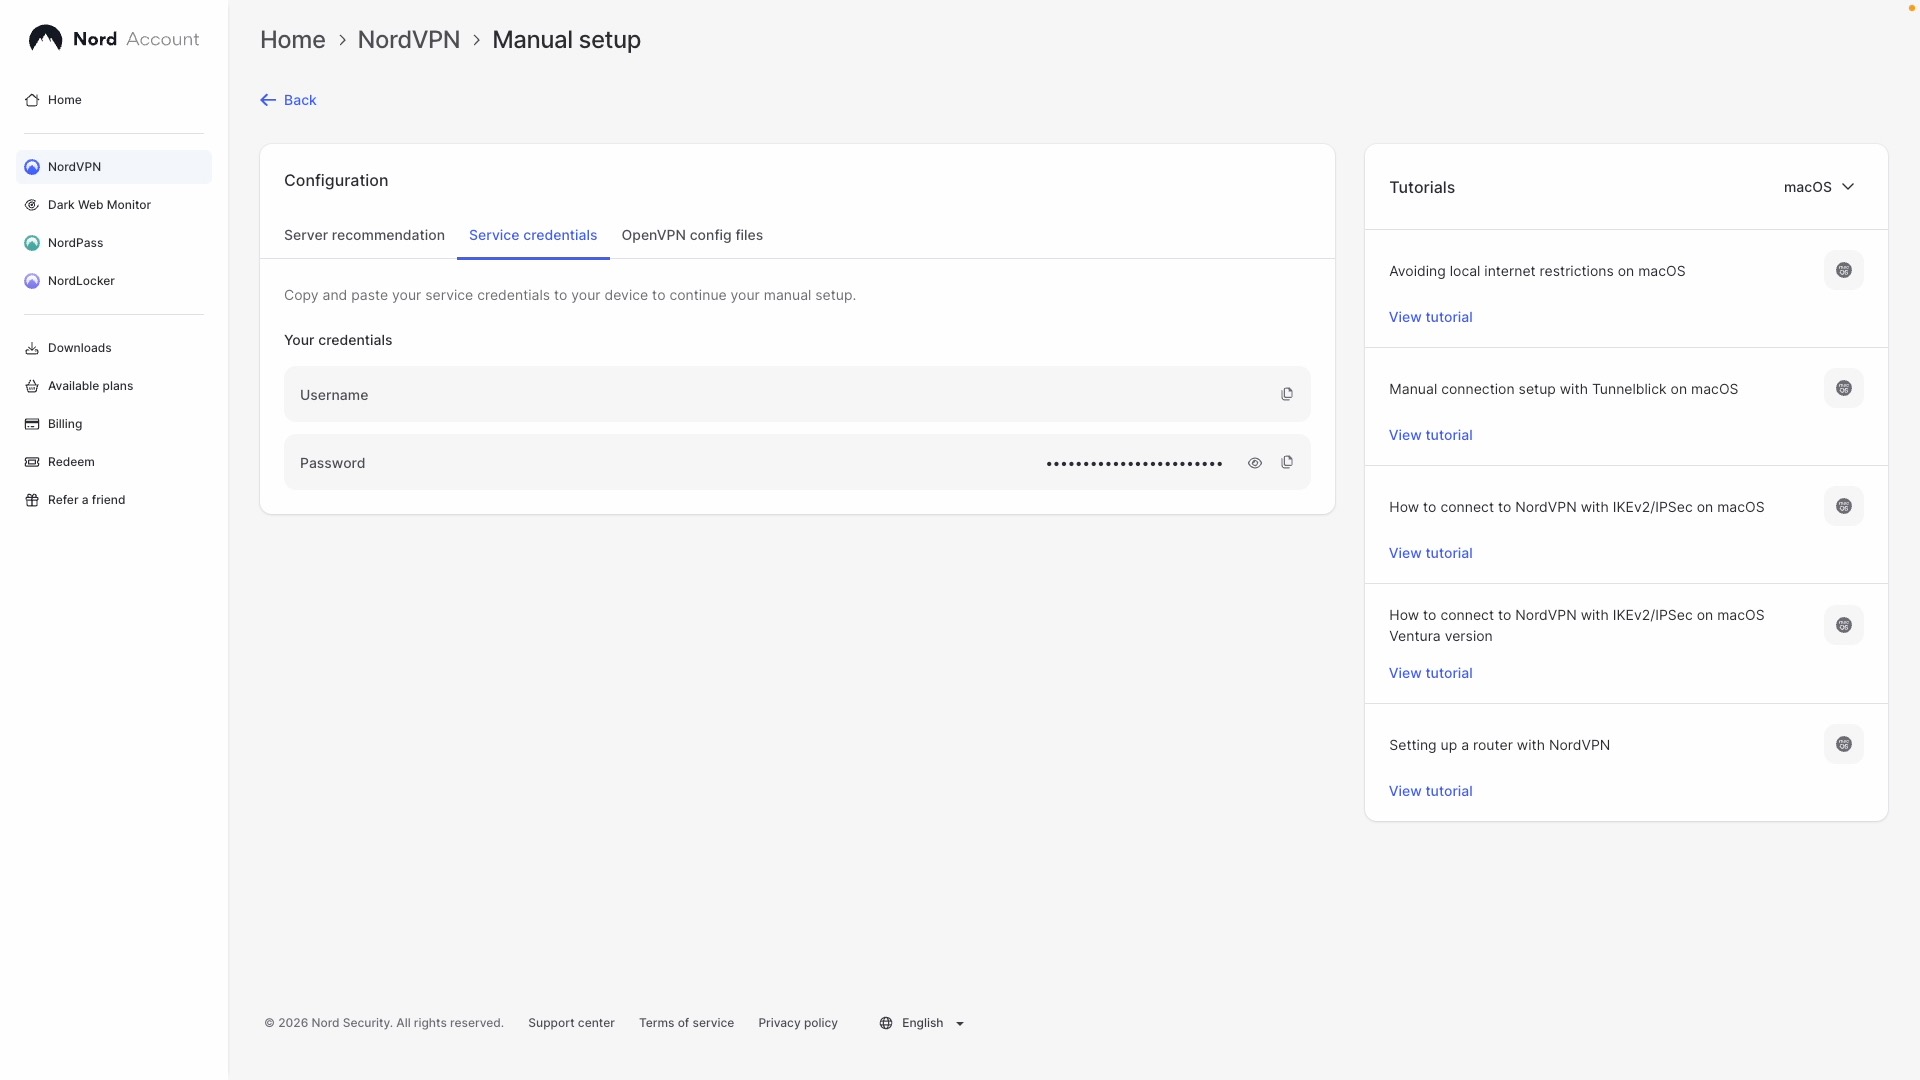
You will now see a username and password that we will use later in the Avtex set up. We can copy the username and password later by clicking the “Copy” icon to the right of the username and password.
In the next steps we will open the file we have downloaded and extract sections of the text and create new files. To do this we will need to use a Desktop, or Laptop to create these files. And either Notepad (PC) or TextEdit (Mac) So, lets get started.
Step 2
Creating the files
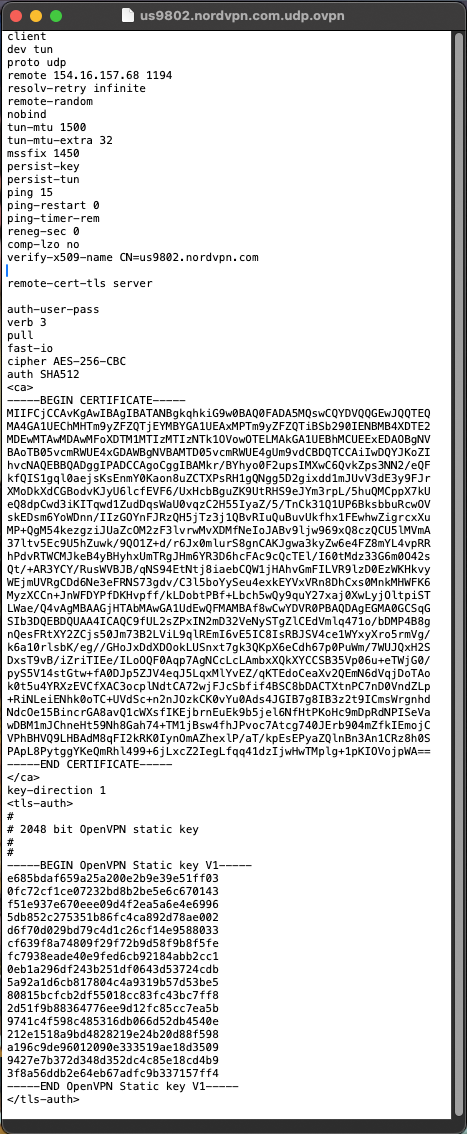
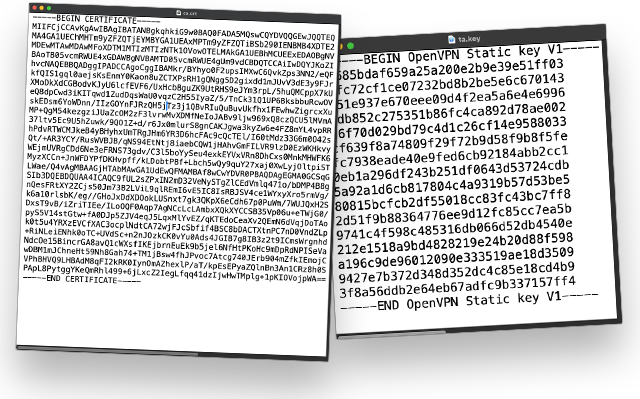
Now we need to create some files based upon the contents of the file we downloaded from NordVPN. So, using Notepad on a PC or Laptop, open the OpenVPN Config file, in my case its us9802.nordvpn.com.udp.ovpn From here on I will refer to this file as the OVPN file. Here is what the file looks like :
Root Certificate File
As you will see lots of information, configuration and settings are contained in this file, we are interested in the section titled : “—–BEGIN CERTIFICATE—–”
Copy the text from “—–BEGIN CERTIFICATE—–” all the way to “—–END CERTIFICATE—–”
Then create a new blank txt file and paste in the contents. Save this file as ca.crt in the same folder as the OVPN file.
TLS-Auth Key file
The next file we need to create is the TLS-Auth Key file. Don’t be scared of what this means, just trust the process. We will use the same method as before. In this instance we are looking for a section of the OVPN file that begins with
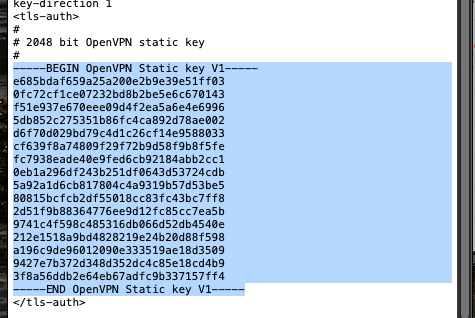
“—–BEGIN OpenVPN Static key V1—–” Select and copy the section until “—–END OpenVPN Static key V1—–”
Create a new text file and paste the contents of the key in that file. Save this file as ta.key in the same folder as the OVPN and Certificate file.
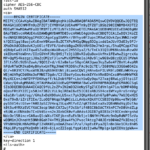
Before moving on make sure your certificate and key file look like the examples below.
Final settings
We should now have 3 files. The original OVPN, the Certificate and Key. There is just one final step to perform before accessing the Avtex router and that is to make a note of the IP address in the OVPN file.
Look for a line at the top of the file titled “remote xx.xx.xx.xx 1194 the xx.xx.xx.xx is the remote IP address we will need later on when setting up the router in my case its 154.16.157.68 You can ignore the 1194, this shows us it the configuration is UDP and using Port 1194.
It’s a good idea to create a file called notes.txt and save this IP address, along with your service credentials inside the file. We will need to refer to these when we configure the VPN on the router.

So far, I have created all the files I need at home. Now I need to visit the caravan and sit next to the router. You can complete the next steps with a phone, but I find it easier using a laptop, and that will be the example I use next.
Step 3
Uploading configuration
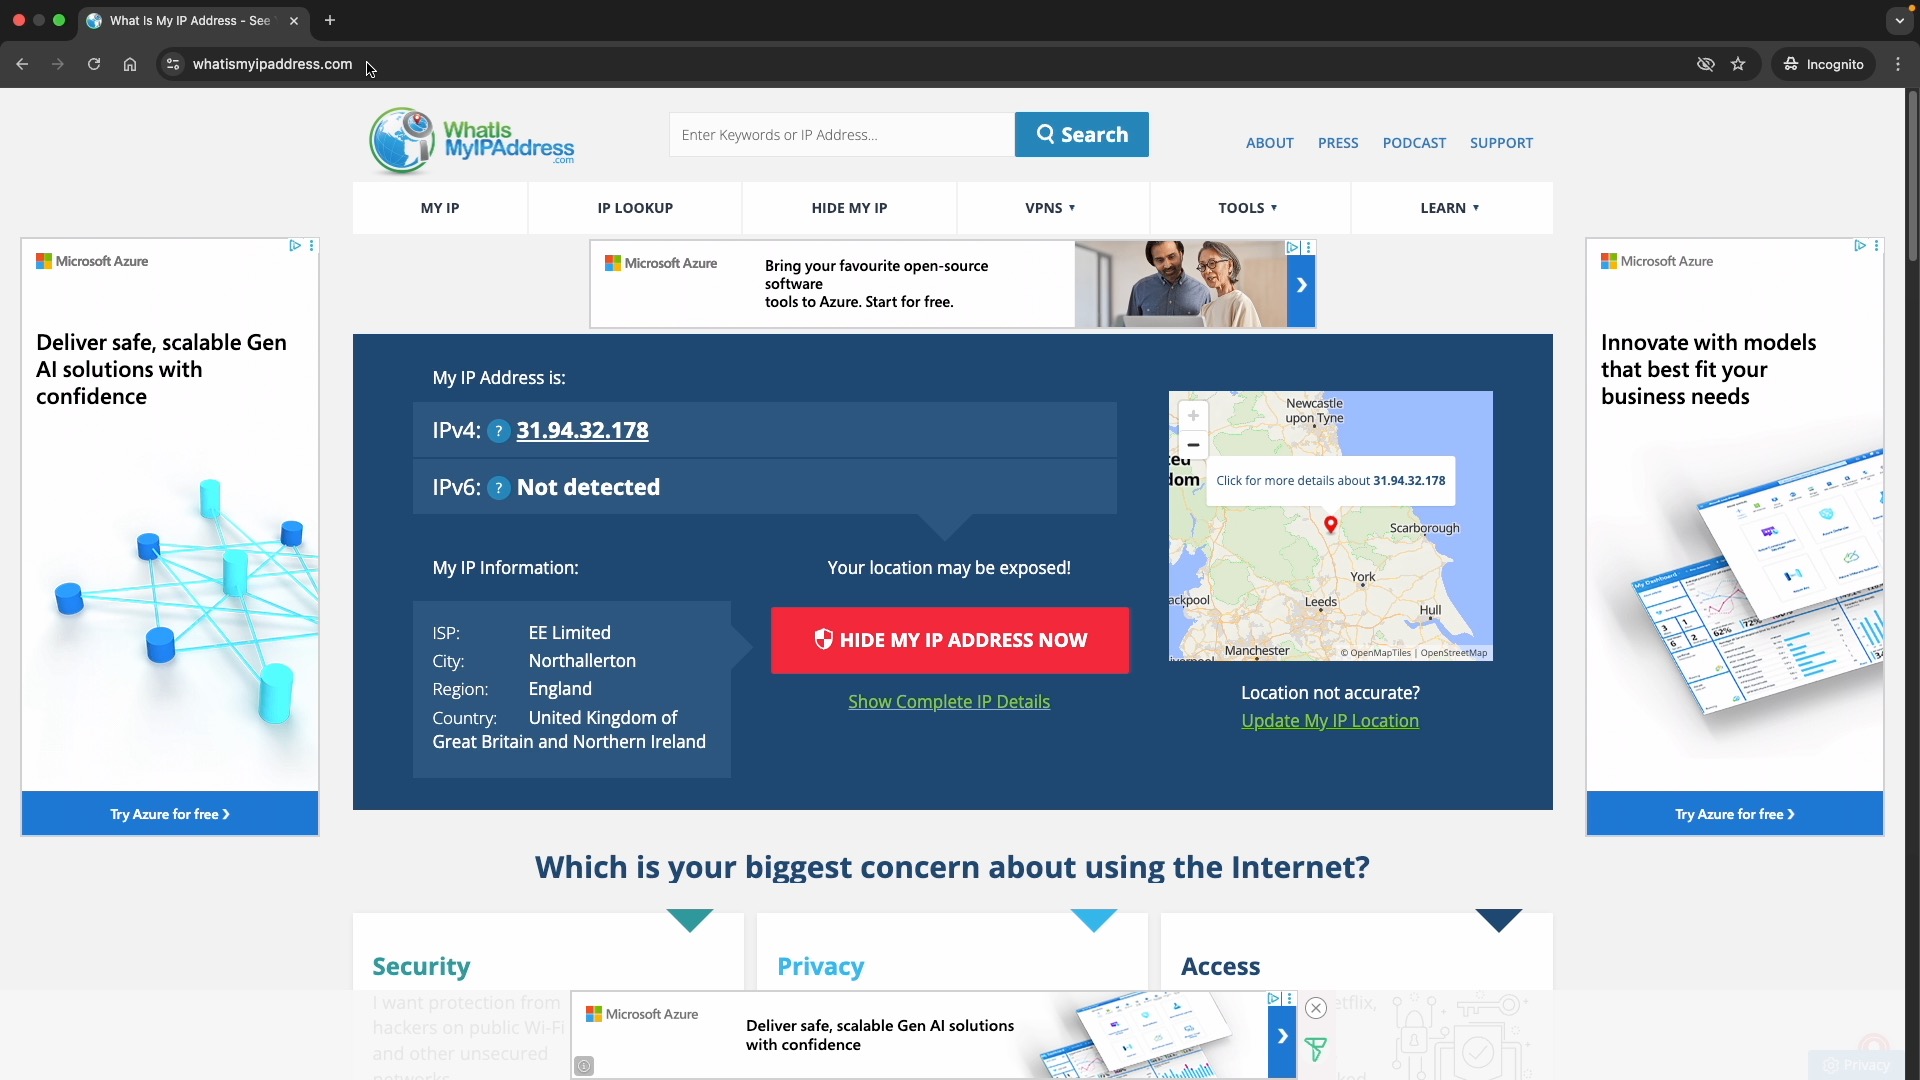
Make sure the Avtex router is on-line and working. As a sanity check, I’m using a website called https://whatismyipaddress.com from here I can see the public IP address, my provider and what the website thinks is my approximate location, that being in Cambridge, UK. This is a useful check to perform later on too. So, everything is working – Here are the steps to installing the VPN on the router :
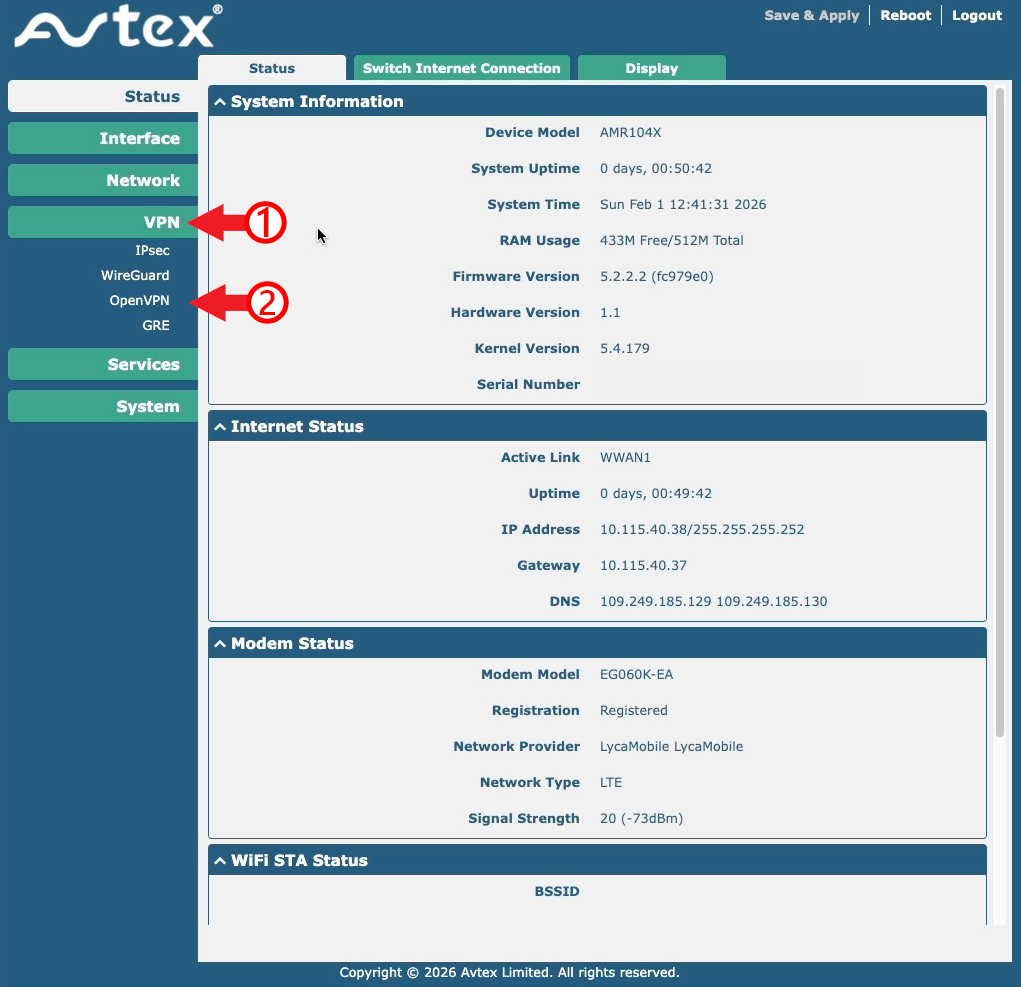
- From a web browser type in https://192.168.1.1 in the address bar and log in using the admin username and 987654321 If this is the first time logging in, you’ll need to change the password upon login.
- Click on VPN on the left, then click on OpenVPN from the drop down menu.
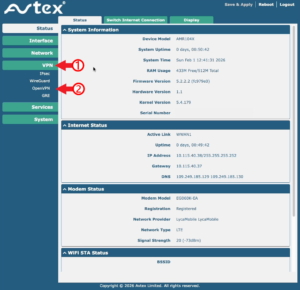
- Then, on the main tab, click on the x509 tab across the top
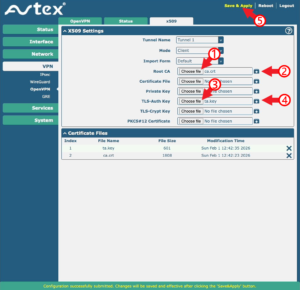
- Make sure the Tunnel Name is Tunnel 1, The mode is Client
- Next to Root CA, click choose file. Select the “ca.crt” file we created earlier.
- Click the small blue icon on to upload the file.
- Next to TLS Auth Key, click Choose File, and select the “Key” file we created earlier.
- Again, click the small blue icon on the same line to upload the file.
- Click Save and Apply at the top of the page to apply these settings

We should now see the two files listed on this page at the bottom of the screen.
Step 4
Creating the VPN profile
With the configuration files uploaded, all we need to do now is create a profile that will use the information we have uploaded. The hard work is behind us now, this may be confusing but you don’t need to understand what it is we are doing, but follow each step slowly and carefully. We will need the information from our Notes.txt file that has the Remote IP and our service credentials documented.
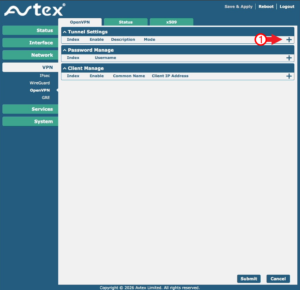
- Click OpenVPN tab on the top
- Click + at the far right in Tunnel Settings.
- Make sure the following are set :
- Enable – ON
- Mode – Client
- Protocol – UDP
- Set the Peer Address to the Remote IP we took from the OVPN file earlier which was 154.16.157.68.
- Peer port should be 1194
- Authentication Type should be Password
- Add your Nord VPN service credentials Username and Password we created back in Step 1, and stored in our Notes.txt
- Next, the Encrypt Algorithm should be AES-256
- Then the authentication algorithm should be set to SHA512
- Finally scroll down to Advanced settings (Its just off the screen and needs to be expanded) and make sure HMAC Firewall is enabled.


Once these settings have been entered, hit Submit then Save and Apply at the top of the screen.
Now we can check if the VPN is running, So click Status and the Tunnel should say Connected
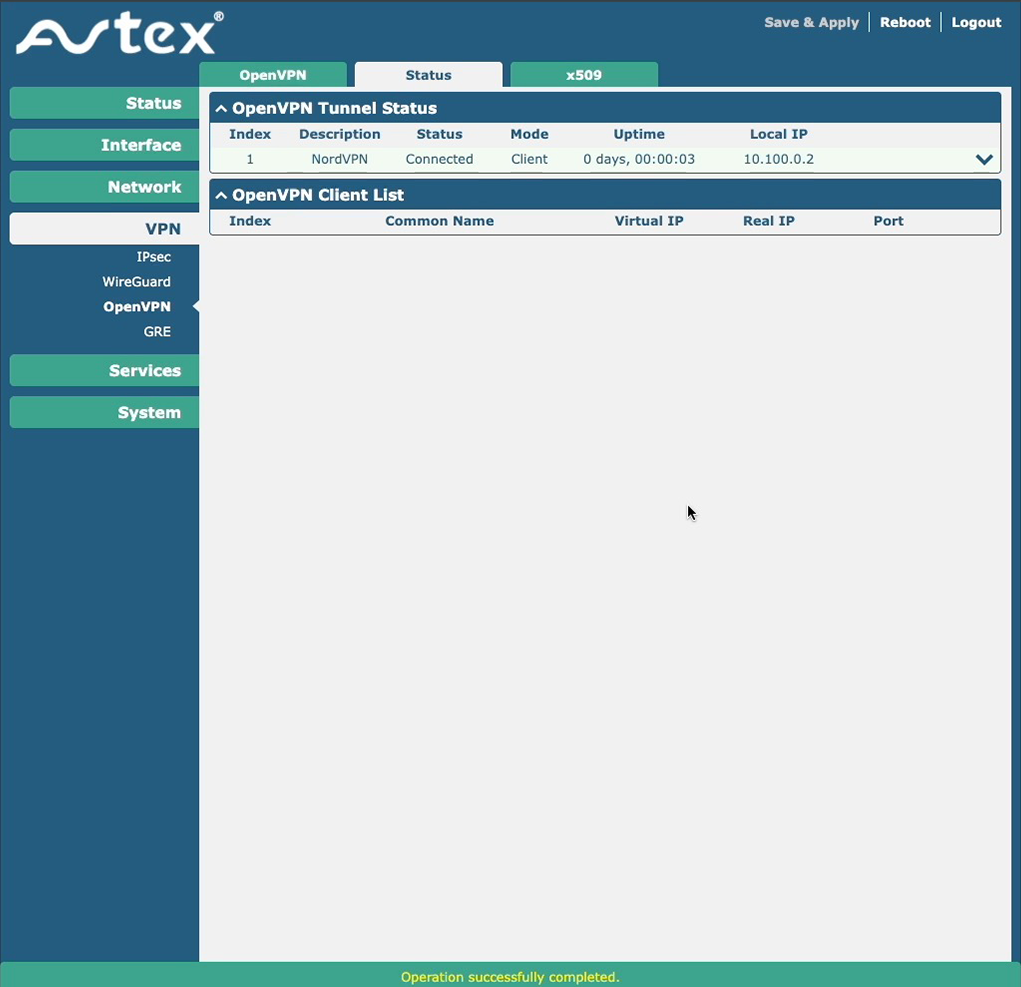
You should see status is “Connected” If you don’t see connected, don’t panic I have a few troubleshooting items to try later on. But right now, lets check if our VPN connection is working as expected.
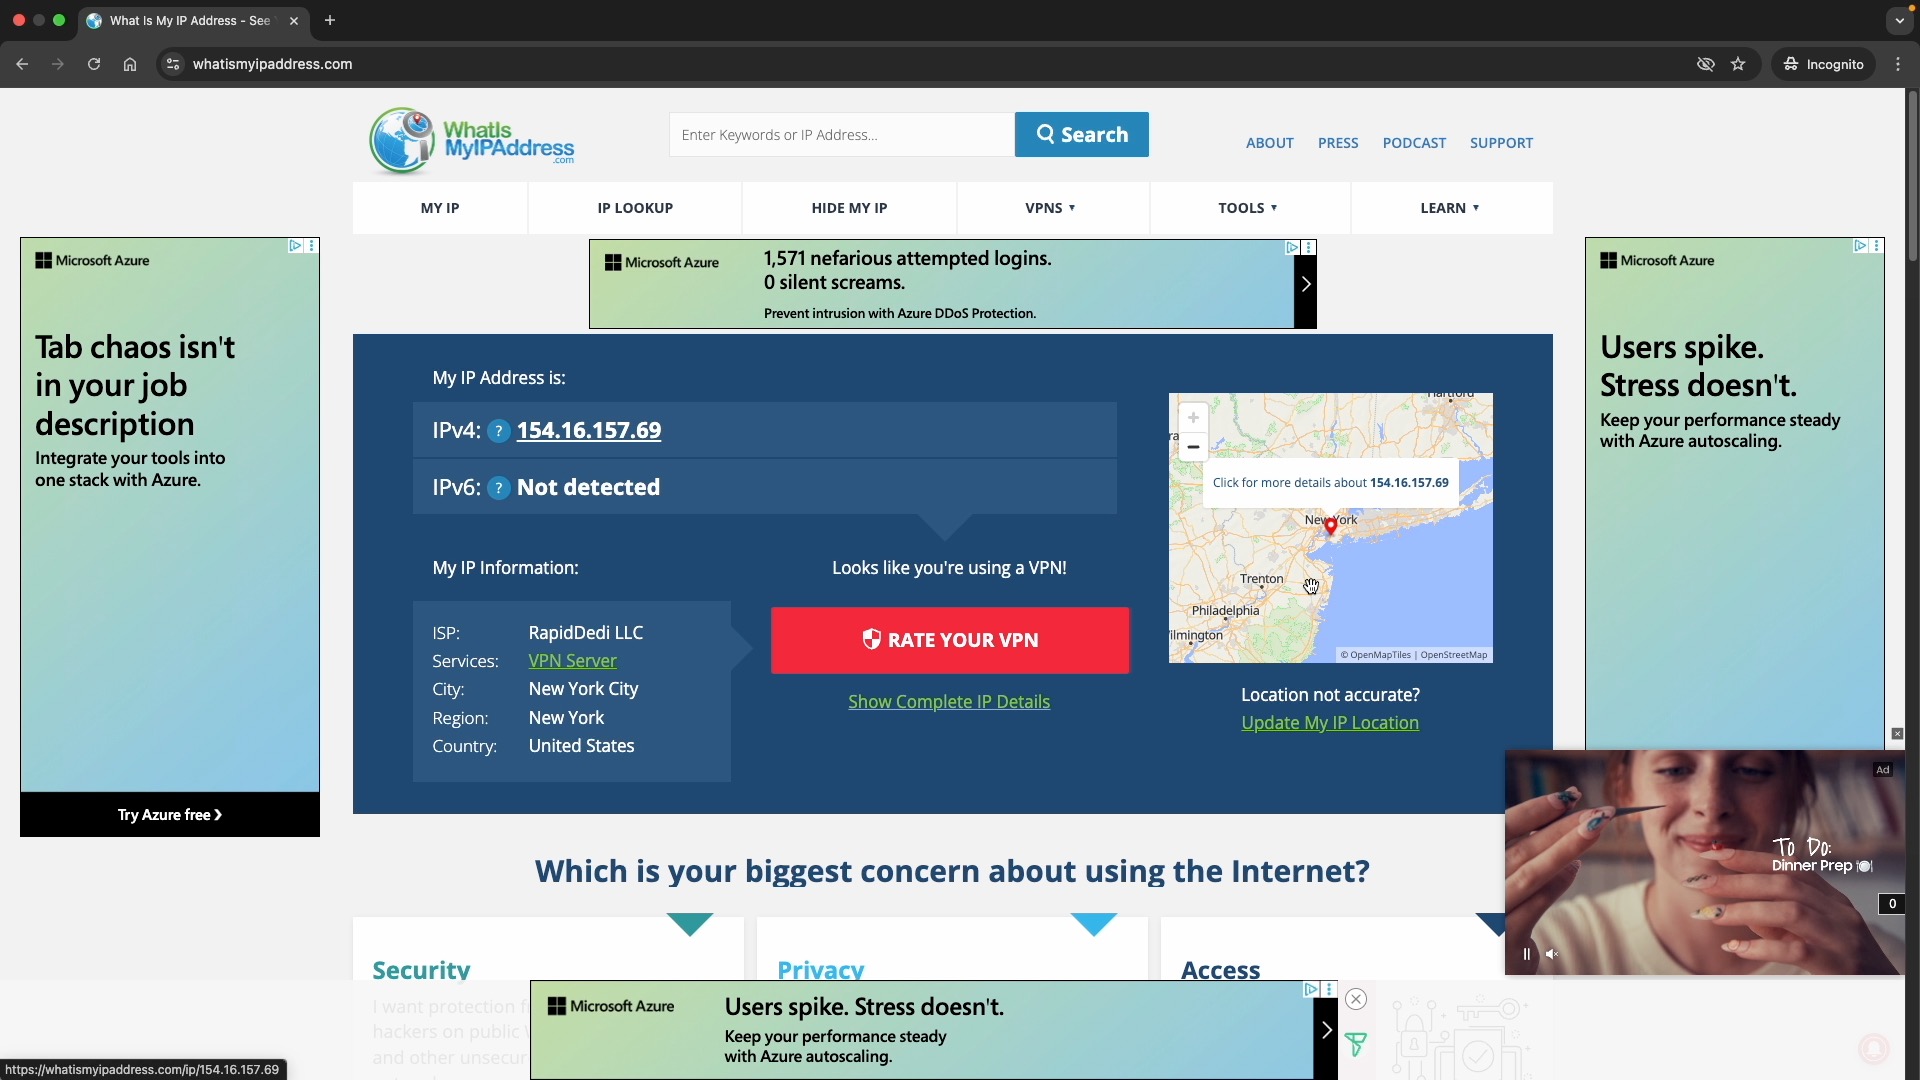
So, lets get back to our web browser and go back to https://whatismyipaddress.com We can see the website shows us a different IP address, and our location is now set in New York, in the United States.
Troubleshooting
If the VPN Status states Disconnected or Connecting
Sadly, when I was figuring this out I came up several brick walls, and in that process I found the logging feature invaluable. You can enable this by :
- Click the edit icon next to the VPN profile we have made.
- At the bottom click on Verbose level. – The higher the number, the more information you will get in the log. Start at 5, then adjust as you see fit.
- Once saved, you can access this log by clicking on System on the left, the Debug. This will give plenty of information and key phrases that you can google to understand the issue more.
If you are still stuck, just make sure you have uploaded the files correctly. I made this mistake a few times, by not selecting Root-CA as the certificate file.
Another key issue I found was not selecting the HMAC Firewall in the advanced settings. This single option caused days of confusion and was the whole reason why it never worked for 3 weeks.
Cannot get onto the NordVPN Network.
If you are connected, but cannot see any difference on your current location, or you just don’t seem to be on the NordVPN network try the following:
- Click on Interface on the left, then Link manager.
- Under link Settings click the EDIT icon next to WWAN1
- Next to Overrided Primary DNS, add the value 8.8.8.8,
- Click Submit and reboot the router
Conclusions
Ok, so now this works, what next?
I visited NORD VPN website and downloaded the OVPN file from UK, France, USA and Canada. I didn’t need to do this process for each location, instead all I needed was to document the remote IP for each location. And that is how you can change the VPN location.
So, when we were in France I updated the Remote Address vakue to the UK IP address. That meant that Mrs T could catch up on her soaps and crucially the iPlayer, ITVx and all the UK based streaming services worked absolutely fine on our smart TV.
As I stated at the outset, this is a fiddly process with lots of pitfalls, but follow the instructions carefully and this should work for you too.