


I recently created a video where I had the Avtex AMR 985 Wifi system installed in the caravan. It’s a complete wifi solution for the caravan, motorhome, boat or shed. In that video I mentioned having a VPN installed on the router.
So why should I have a VPN?
Try to access the BBC iPlayer if you are in Spain, France or anywhere outside of the UK, and you will be stopped due to a rights issue. With a VPN you can set your location and access content designated for that country. Other providers such as Netflix, Disney+ and Paramount, region lock their shows for specific countries too. Shows that are available in the US and not available in the UK, can be enjoyed if we set via our VPN a location inside the USA. If you are in Spain, and want to know what’s happening in Eastenders, well you can easily achieve this via a VPN too. Adding the VPN to the router makes sure that all connected devices are protected and more importantly, devices that cannot support a VPN connection like Smart TVs or streaming sticks can take advantage of switching locations and unlocking unavailable content.
I want to set up a VPN connection from the US. So, in this article, I will go through step by step what needs to be done.
Step 1
Preparation
First of all, we need to make sure we are online. As a sanity check, I’m using a website called https://whatismyipaddress.com from here you can see the public IP address, my provider and what the website thinks is my approximate location, that being in Cambridge, UK. This is a useful check to perform later on.

The next thing I need is a VPN account. I use Nord VPN, and have done for about 9 years. There are many VPN providers right now, so it is your choice. However, the magic phrase when searching for a VPN provider is “OpenVPN configuration” All the big VPN companies will support this, It’s a prebuilt configuration file, that makes adding and configuring the details really simple.
So, lets download that configuration file.
- Visit https://nordvpn.com/servers/tools/
- Click “Select Country” from the pull down list on the right, and select United States.
- Click on Show available protocols on the left
- We want to download the OpenVPN TCP file and save that to our desktop.
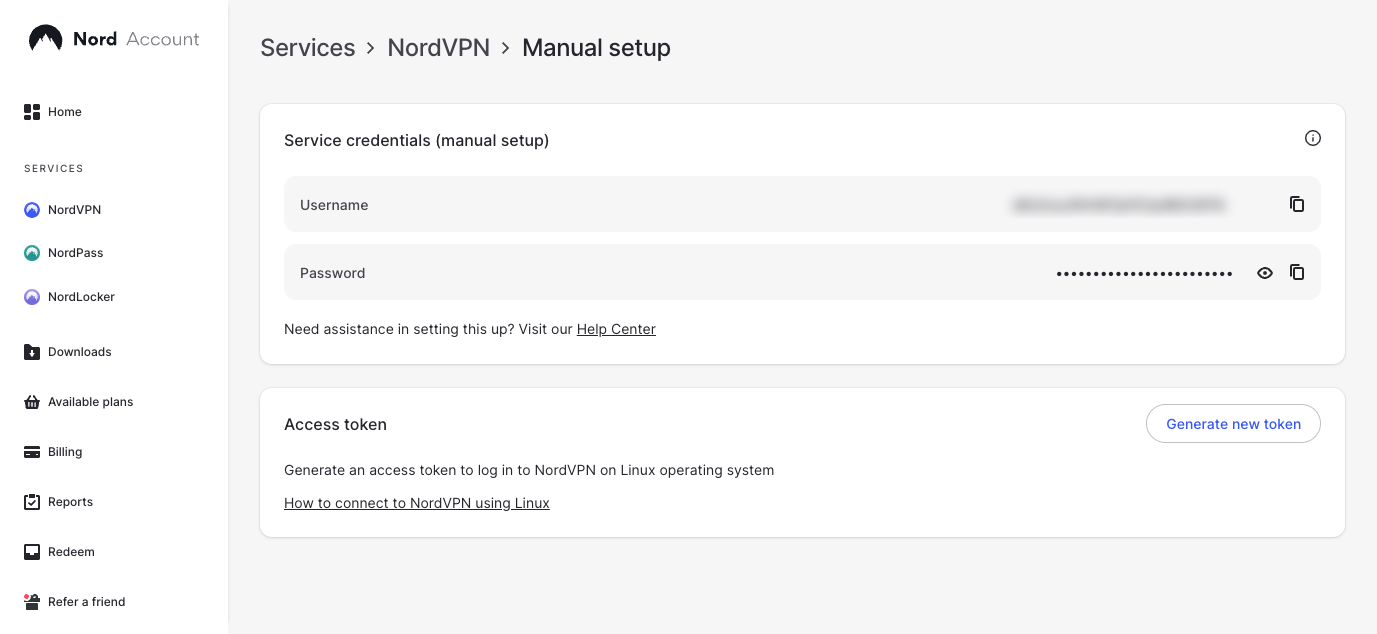
Since June 2023, Nord have changed the way 3rd party devices log into Nord VPN, and for this to work, we will need “Service Credentials”. It’s very easy to do, and only applies to Nord VPN.
Log into your Nord VPN account. The from the left, under services choose NordVPN.
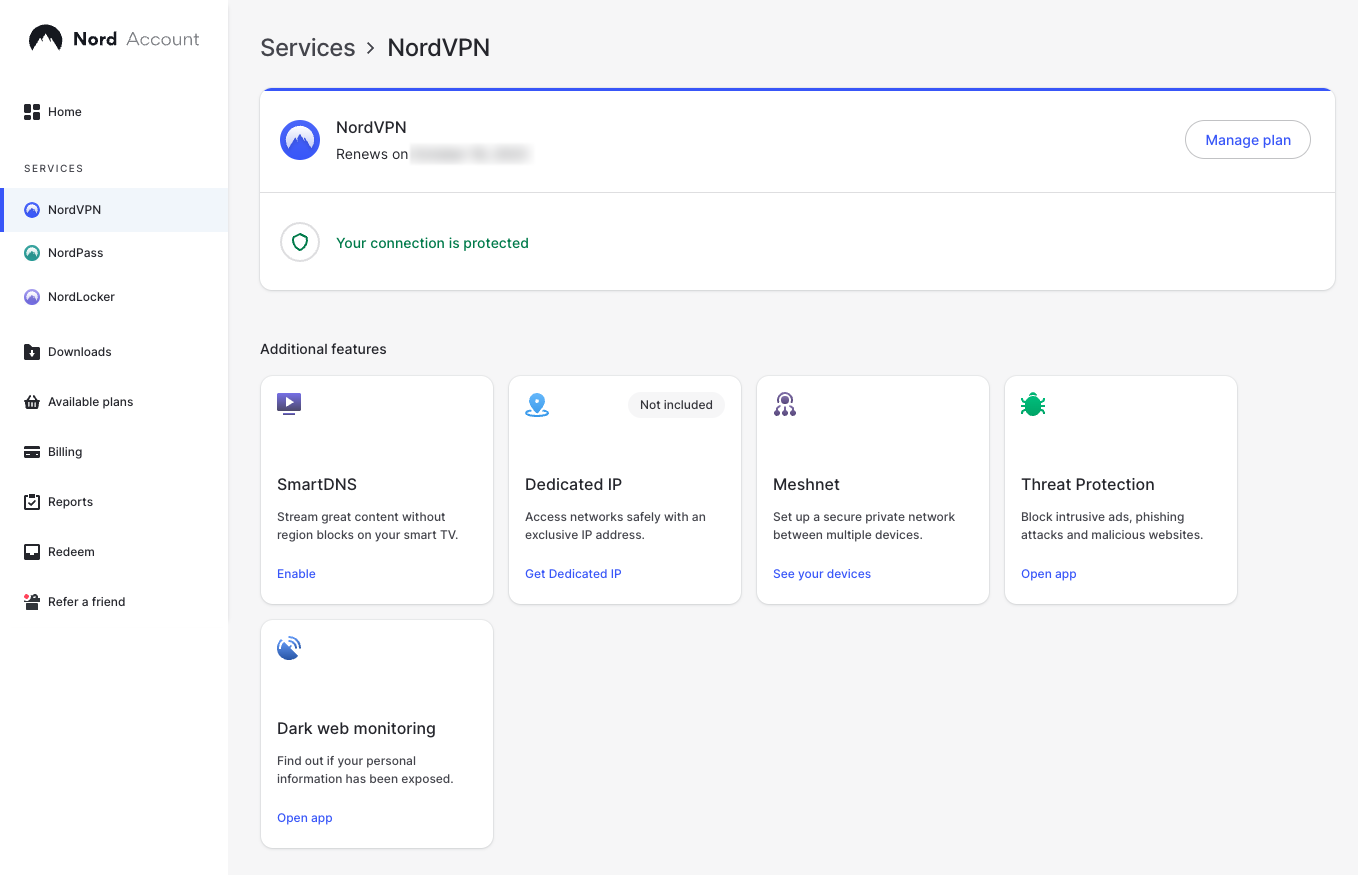
On this page, scroll towards the bottom and choose “Set up NordVPN manually.
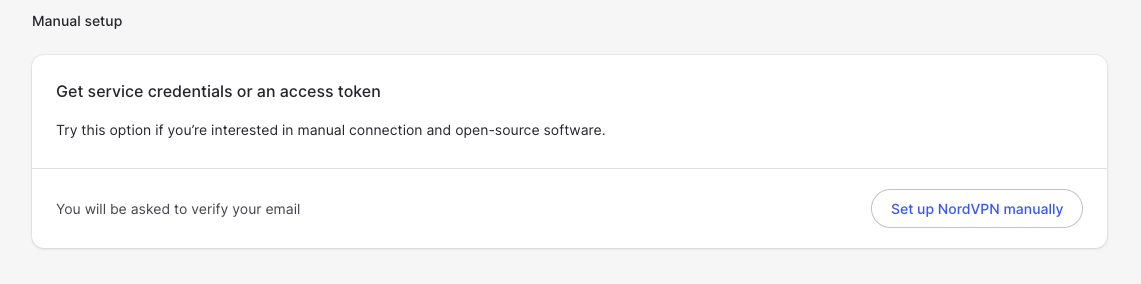
You will now be sent a verification code to your email address, registered with NordVPN. When you get it, type the code in to continue.
You will now see a username and password that we will use later in the Avtex set up. We can copy the username and password later by clicking the “Copy” icon to the right of the username and password.
Right, that’s all the leg work done, Lets log into our Avtex router.
Step 2
Create the VPN Profile
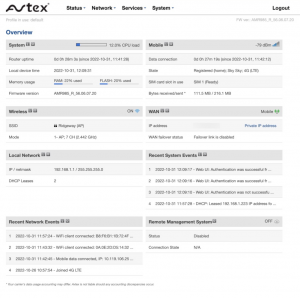
- From a web browser type in https://192.168.1.1 in the address bar and log in using the admin username and “987654321” password, If this is the first time logging in, you’ll need to change the password. Your screen should look like this:
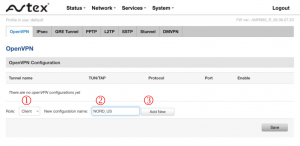
- Click on Services, then VPN which will open the OpenVPN tab.
- On the OpenVPN tab :
- Make sure the Role is set to Client
- Type in a useful name, I’m calling mine NORD_US
- Click Add new.
- Now its created, we click Edit to configure the profile.
- Click on enable to enable it straight away,
- Click OpenVPN configuration file, then we can browse for the configuration file we downloaded before and click upload.
- Click the checkbox that states “Upload Authentication Files”.
- Click on authentication and choose password,
- Add your Username and password we obtained earlier when getting our “Service Credentials” here.
- Next, click save, and that’s it.


We are not quite finished yet, we have created the VPN client but now need to update the DNS servers.
Step 3
DNS servers
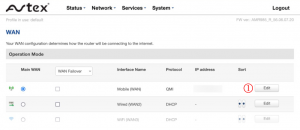
- Click Network, then WAN
- Choose Mobile from the list below and click Edit.
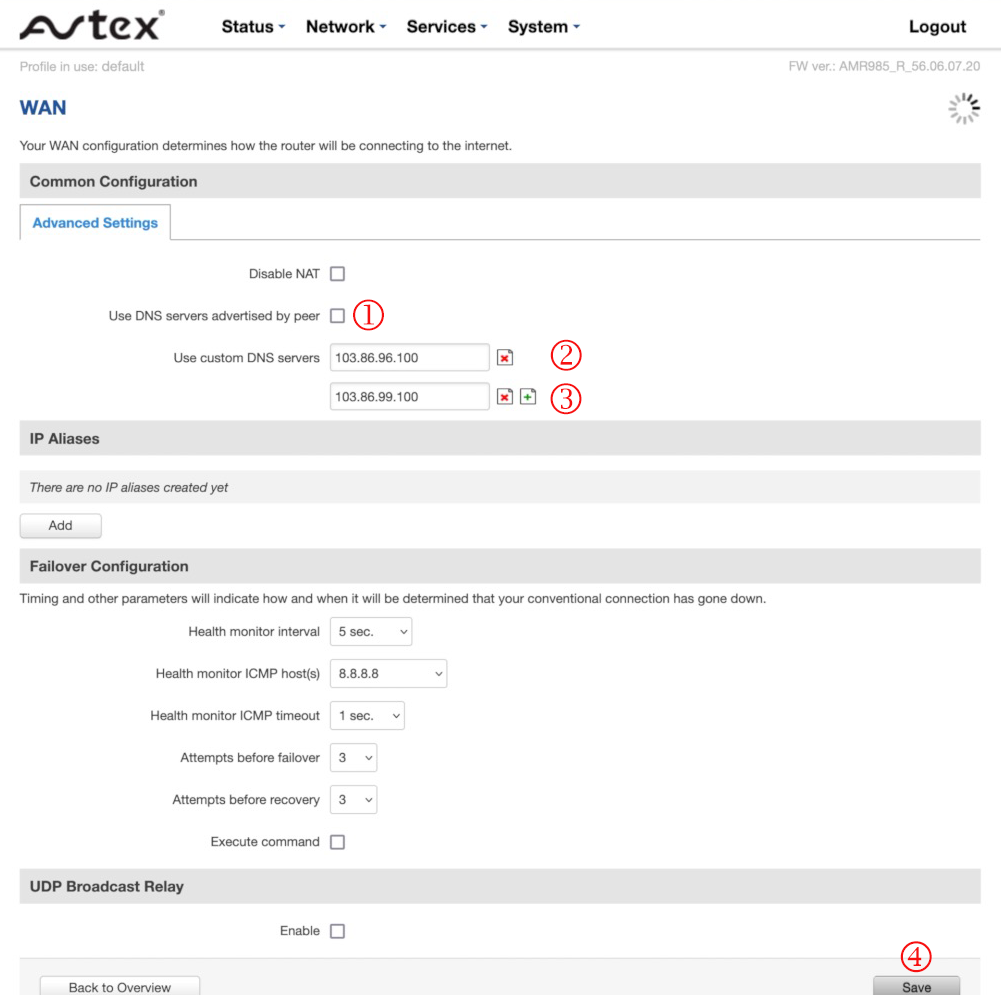
- Uncheck use DNS servers from peer, and then type the NORD VPN DNS servers:
- Type in 103.86.96.100 click add
- Type in 103.86.99.100 click add
- Click Save

And there we are done.
Now, a good idea is to restart the router to make sure all settings are applied. So, click on System and Reboot, then the Reboot button.
Once it’s back up and running log back into the router and check if the VPN is running.
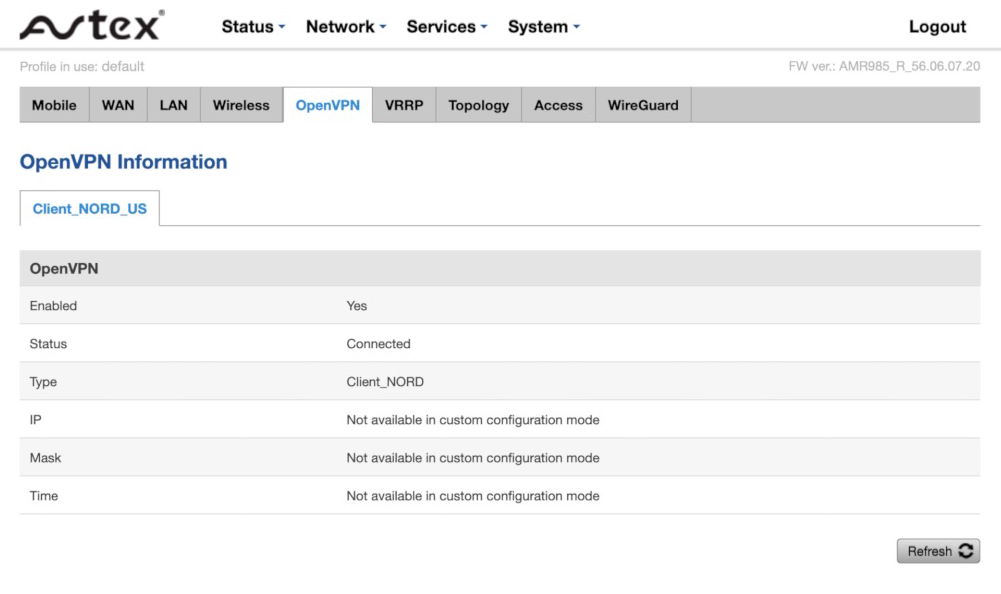
Click Status, then Network, finally OpenVPN
You should see the Enabled status Yes, and the Connection is “Connected”
So, lets get back to our web browser and go back to https://whatismyipaddress.com We can see the website shows us a different IP address, and our location is now set in the United States.

If all has gone well, then thats all you need to know. Repeat this process for as many VPN locations as you require. We typically have one for UK, US, Canada and Japan.